Before you start
- A Google Workspace super administrator – only a super admin can allow domain-wide delegation in the Google Admin console.
- Permission to create a project in Google Cloud console with the same organisation (most Workspace admins have it).
- O365 Migration on the PC that will run the migration – free 7-day trial.
Step 1: Create a Google Cloud project
Open Google Cloud console → New Project. Name it, for example Migration Tool, choose your organisation as the parent (not "No organization" – that is a personal account) and click Create. Make sure the new project is selected at the top of the page for the next steps.

Step 2: Enable the Google APIs
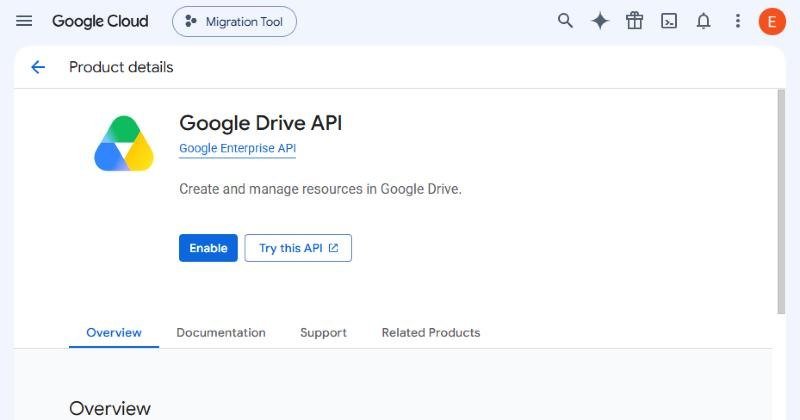
APIs & Services → Library: search each API, open it and click Enable. Enable only what you will migrate:
| API | Needed for |
|---|---|
| Google Drive API | My Drive, Shared with me, shared drives |
| Gmail API | Mail with labels as folders |
| Google People API | Contacts |
| Google Calendar API | Calendars and events |
Step 3: Create a service account
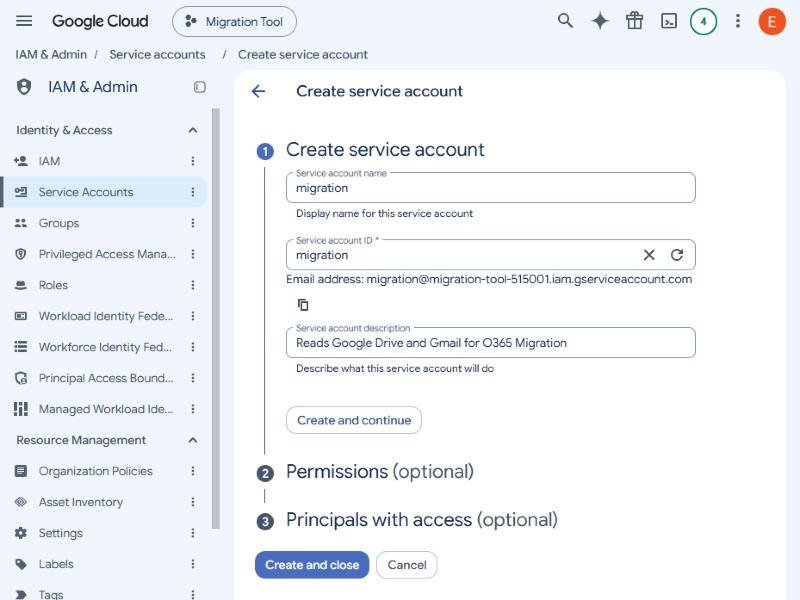
IAM & Admin → Service Accounts → Create service account. Name: migration, a description, then Create and close. Skip the optional Permissions and Principals steps: the service account needs no Google Cloud roles – its access comes from domain-wide delegation (step 6).
Step 4: Copy the service account's client ID
Open the service account. The Unique ID (a long number) is its client ID – copy it for the Admin console. The email address (migration@<project>.iam.gserviceaccount.com) identifies it in logs.

Step 5: Create and download a JSON key
Tab Keys → Add key → Create new key → JSON → Create. The browser downloads a .json file: this is the key O365 Migration uses. Keep it like a password – store it on the migration PC only and delete the key in this tab when the migration is finished.
If key creation is blocked, an organisation policy (iam.disableServiceAccountKeyCreation) is on: a Google Cloud Organization Policy Administrator can make an exception for this project.

Step 6: Open domain-wide delegation in the Admin console
Sign in to the Google Admin console as a super admin: Security → Access and data control → API controls → Manage domain wide delegation.

Step 7: Add the client ID with the read-only scopes
Click Add new. Client ID: the Unique ID from step 4. OAuth scopes: paste the scopes for what you migrate, separated by commas, then Authorize:
| Migration | Scope (all read-only) |
|---|---|
| Google Drive | https://www.googleapis.com/auth/drive.readonly |
| Gmail | https://www.googleapis.com/auth/gmail.readonly |
| Contacts | https://www.googleapis.com/auth/contacts.readonly |
| Calendars | https://www.googleapis.com/auth/calendar.readonly |
All four, ready to paste:https://www.googleapis.com/auth/drive.readonly,https://www.googleapis.com/auth/gmail.readonly,https://www.googleapis.com/auth/contacts.readonly,https://www.googleapis.com/auth/calendar.readonly
The tool only reads from Google – it never changes, moves or deletes anything there. Allow a few minutes (rarely up to 24 hours) before the first test.

Step 8: Add the service account in O365 Migration
In O365 Migration: Google Drive → Add Google account → Service account. Choose the JSON key file, type a Workspace user to test with and click Add and test. If a scope or the delegation is missing, the error names the client ID and the exact scopes to add.

Step 9: Optional: OAuth consent screen for "Sign in with Google"
Only needed if you migrate one account by signing in as that user instead of using a service account. Google Auth Platform → Get started: app name (e.g. O365 Migration) and support email; Audience: Internal (Workspace users only, no Google verification); contact email; agree to the Google API Services User Data Policy; Create. (A personal Gmail account can only choose External – then add the account under Audience → Test users.)

Step 10: Optional: add the scopes under Data Access
Data Access → Add or remove scopes. Paste the same four read-only scopes in Manually add scopes, click Add to table, Update, then Save. Drive and Gmail show as restricted scopes – fine for an Internal app.

Step 11: Optional: create a "Desktop app" OAuth client
Clients → Create client → Application type: Desktop app, name it and click Create, then Download JSON. In O365 Migration choose Sign in with Google and pick this JSON file – Google's own sign-in page opens in the browser. The client must be Desktop app; a "Web application" client is refused.

Good to know
- Which method? Service account + domain-wide delegation copies every user and every shared drive without passwords – use it for organisation migrations and bulk CSV imports. "Sign in with Google" copies one account (its own Drive or mailbox).
- Shared drives are read through delegation too: if the user you type is not a member of a shared drive, the app reads it as one of its members and says so in the report. In the bulk CSV,
shared:Drive nameas the source folder means that shared drive. - Only Drive? Allow only
drive.readonlyand enable only the Drive API – the app asks only for the scopes of the migration you run. - When the migration is finished: delete the key under Keys, and remove the client ID from domain-wide delegation.
Need help?
Search the help center, open a support ticket, or let us run the migration for you.
Related guides
Migrate Google Drive to SharePoint Online and OneDrive
My Drive, Shared with me and shared drives – Google Docs, Sheets and Slides as PDF or Office files.
5 steps · 20 minutes (first time)Migrate Gmail to Exchange Online (Microsoft 365)
Every user's Gmail with labels as folders, contacts and calendars – from a CSV of users.
6 steps · 30 minutes (first time)Register an Entra ID app with the permissions for every migration
App registration, Microsoft Graph and SharePoint application permissions per product and tenant, admin consent, certificate or secret – with screenshots.
11 steps · 15 minutes per tenant (Entra admin)